Fun with OCI Functions - Part 1
The age of Serverless is upon us. Let's play with it!

In part 1 of this series, we will prepare an environment to play with Oracle OCI Functions and we will kick the tires of the Document Generator Pre-Built Function (PBF).
Note: Part 2, Part 3, and Part 4 are now available.
Most tasks will be done using the OCI Console, although we will use Terraform through OCI Resource Manager to accelerate the building of some resources (also because it's more fun and repeatable than doing everything manually at the OCI Console).
An optional section at the end will be helpful for the curious as I explain the Terraform code.
A few definitions before we start
Functions
Functions is a serverless platform based on the Fn Project that enables you to create, run, and scale business logic without managing any infrastructure.
OCI Functions
A fully managed, on-demand, Functions-as-a-Service platform. With OCI Functions, you can write code in Java, Python, Node, Go, Ruby, and C#. You can deploy your code, then call it directly or trigger it in response to events.
OCI Pre-Built Functions
Pre-built Functions (PBFs) provide you with a catalog of ready-to-use tasks implemented using Oracle Cloud Infrastructure Functions.
Document Generator PBF
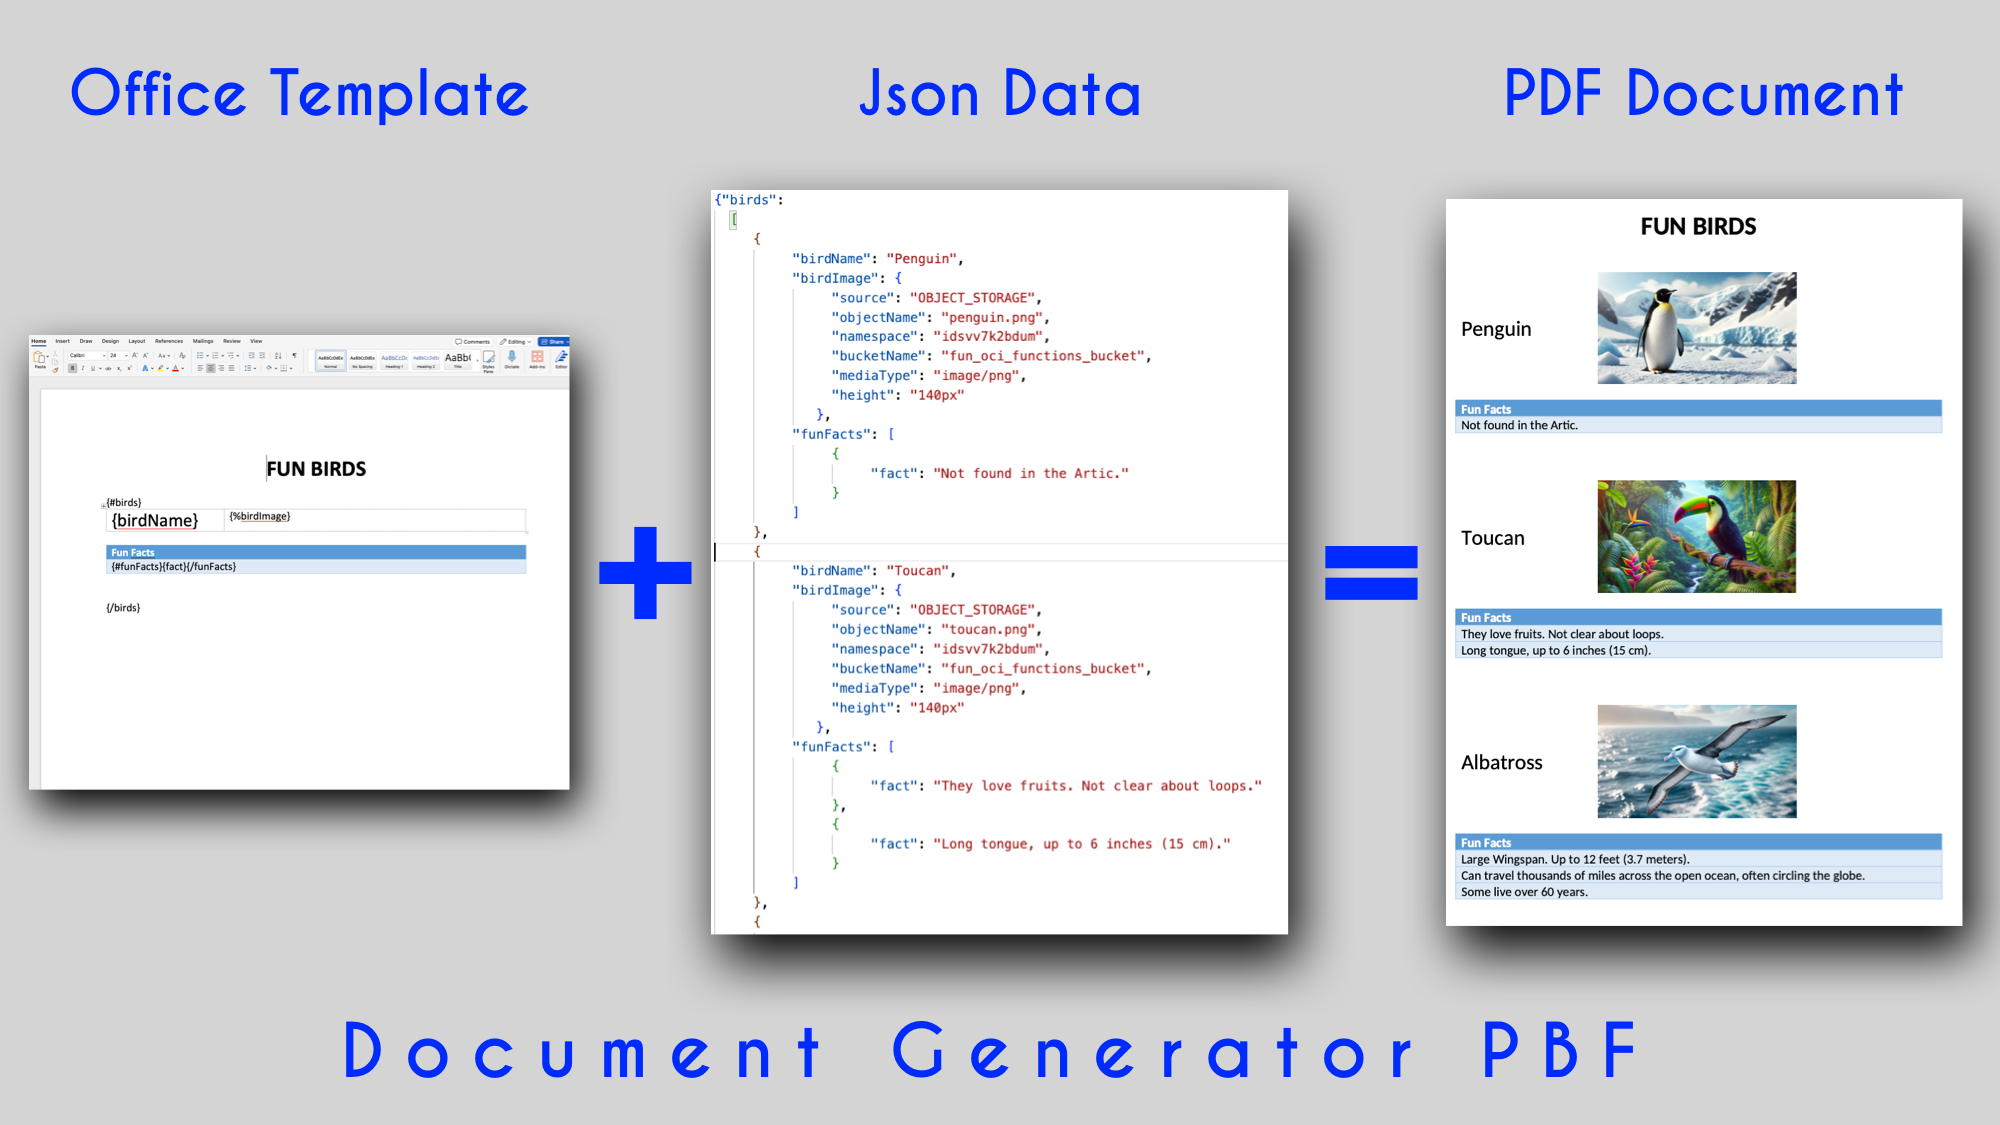
A PBF to generate PDF documents based on Office templates and JSON data.
Terraform
Infrastructure-as-code (IaC). Automates the creation of Cloud Infrastructures.
OCI Resource Manager
A Service that automates deployment and operations for all Oracle Cloud Infrastructure resources. The service is based on Terraform.
OCI Cloud Shell
A web browser-based terminal accessible from the Oracle Cloud Console.
Let's start
Login to your OCI Cloud account. If you do not have an account, you can start a 30 days trial with Oracle Cloud Free Tier.
After your 30-day trial, OCI Functions require a Pay As You Go (PAYG) account, but PAYG accounts have a huge amount of Function calls (2 millions) and execution time (400,000 GB-seconds) for free every month.
Create resources with the OCI Console
Create a Compartment
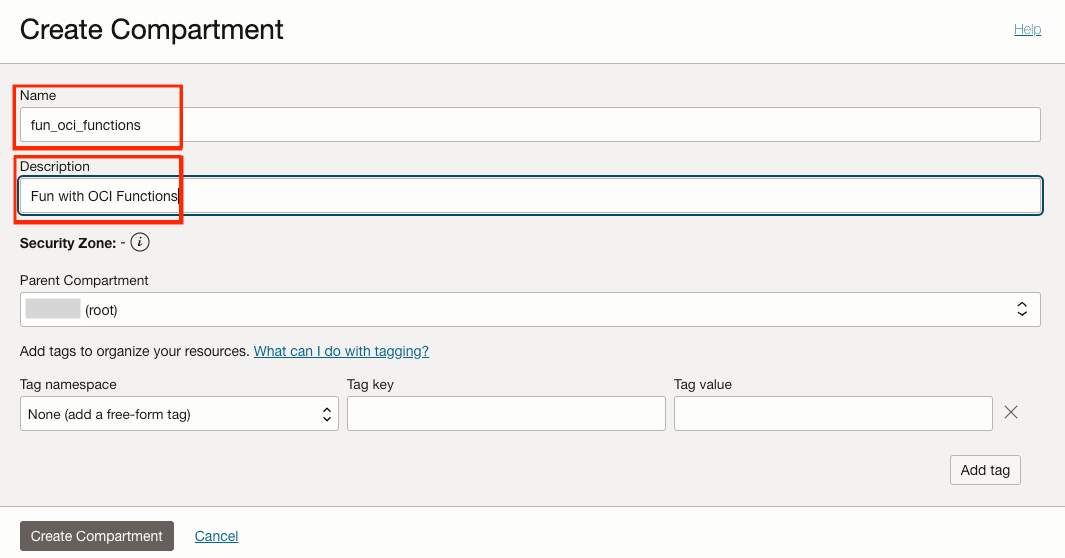
We will create a compartment named fun_oci_functions in which we will create all our resources to isolate our resources and also for future clean-up.
In the OCI Console Hamburger menu, Select Identity & Security, Compartment, then click Create Compartment. Fill as shown below.
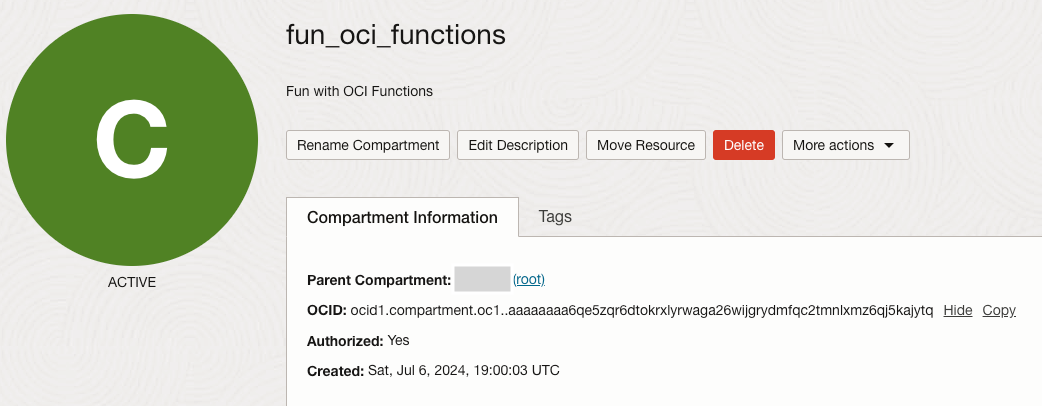
The big green circle indicates that the compartment fun_oci_functions is created.
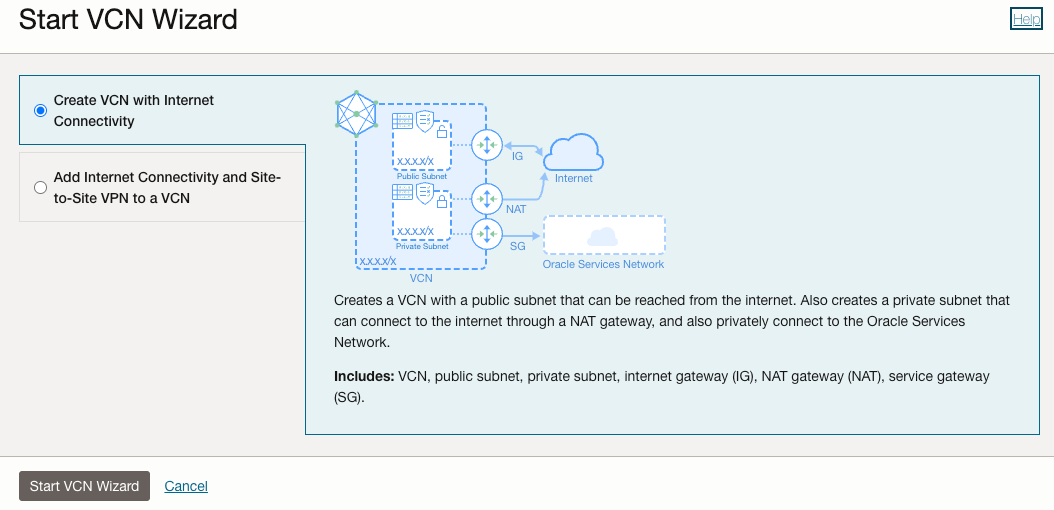
Create a VCN using the VCN Wizard.
In the OCI Console Hamburger menu:
- Select Networking, Virtual cloud network.
- On the left, make sure that the Compartment fun_oci_functions is selected.
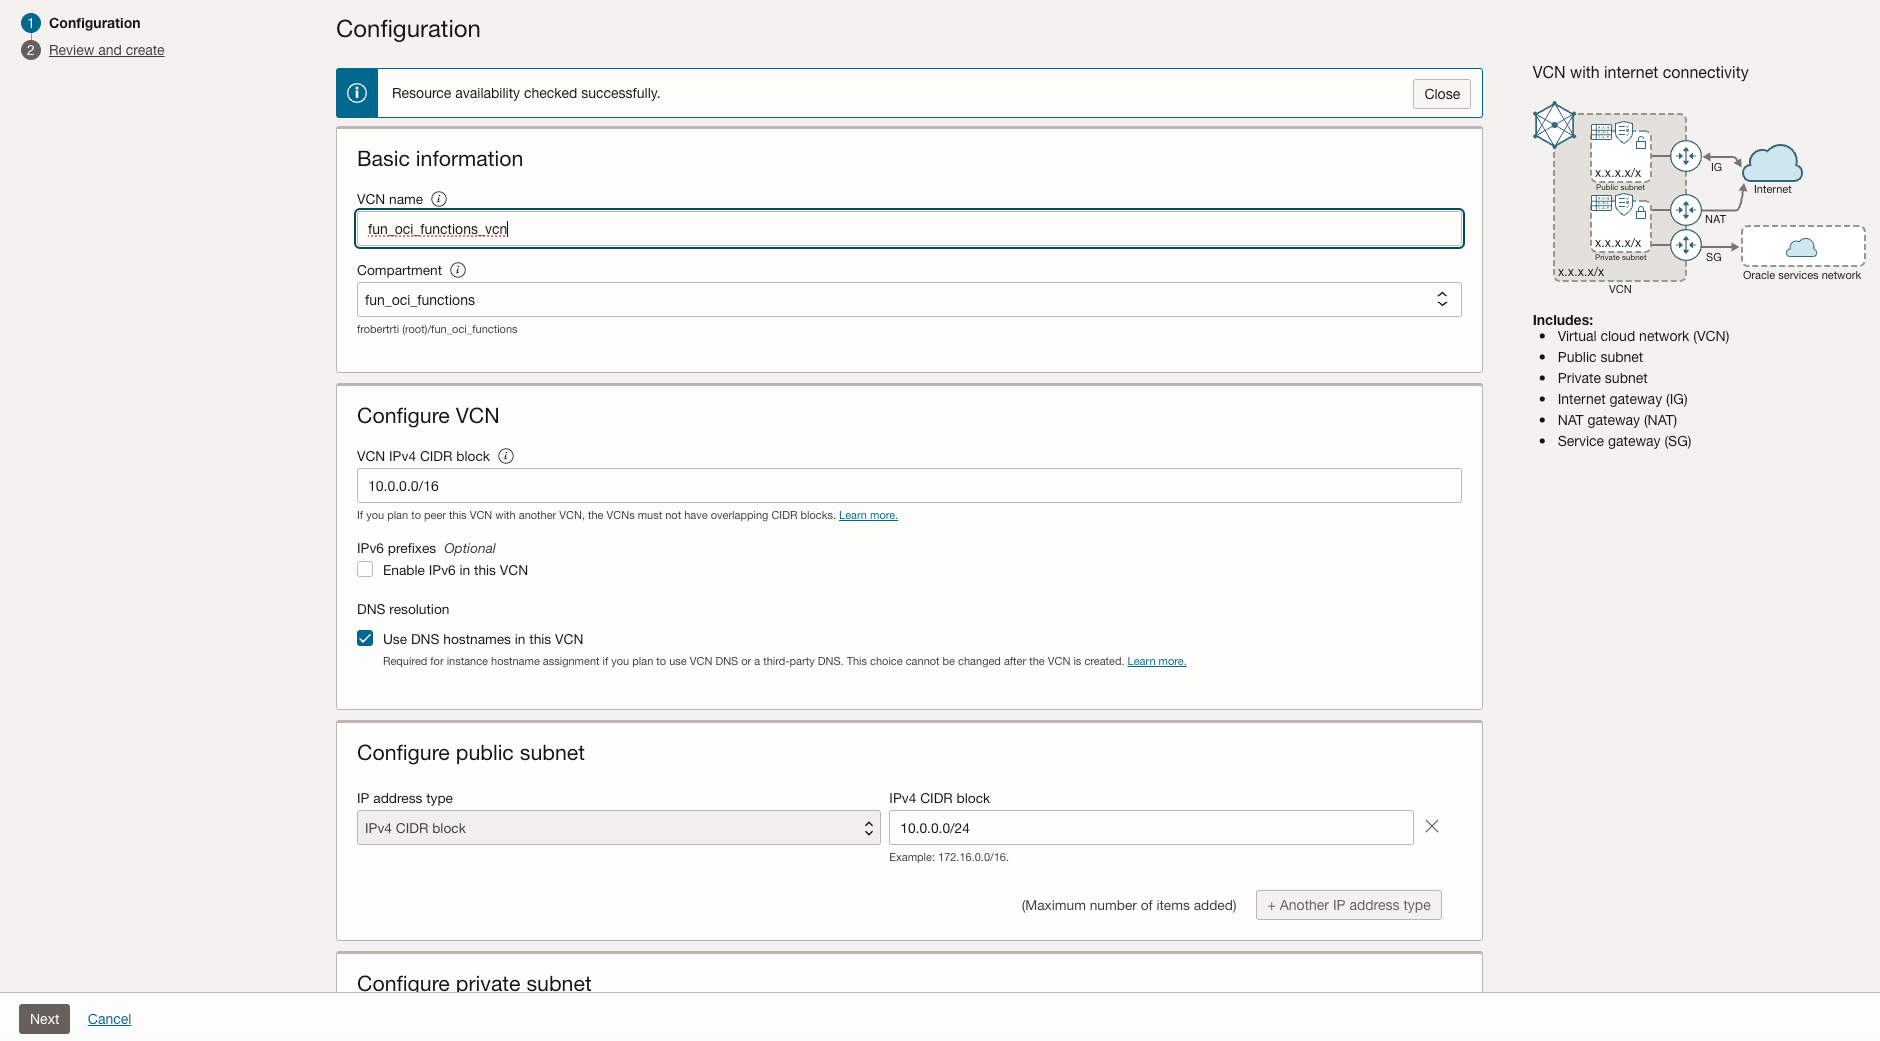
- Click Start VCN Wizard. Select a VCN with Internet Connectivity.
Fill as shown below with VCN name fun_oci_functions_vcn and Compartment fun_oci_functions. Click Next, then Create.
Once the VCN is created, click View VCN. You will see something like:
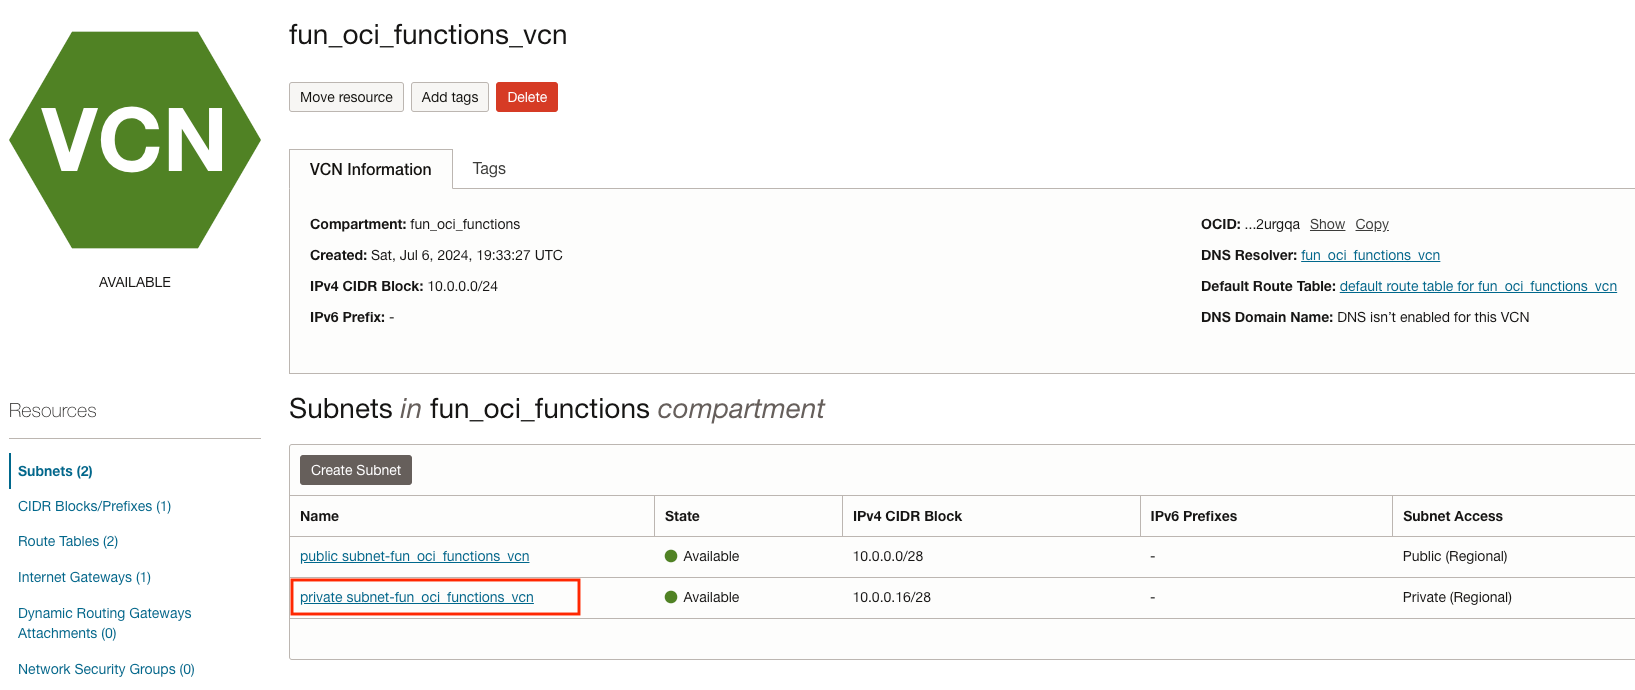
Click on private subnet-fun_oci_functions_vcn.
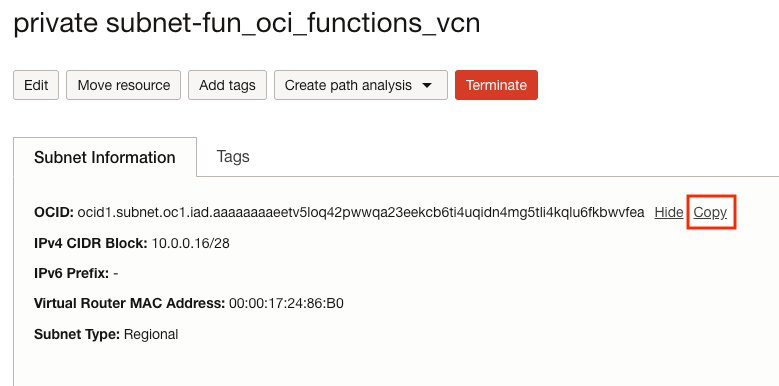
Note the private subnet OCID. We will refer to it as sss.
Create resources with Terraform
The rest of the infrastructure is defined using Terraform (Infrastructure as Code, did you remember?) using OCI Resource Manager.
Clone or Download the repo that I have prepared on GitHub, it contains the Terraform code that we will use.
OCI Resource Manager
In the OCI Console Hamburger menu, Select Developer Services, then click Resource Manager.
Not related to this, while you are in Developer Services, you might want to check OCI Database Tools. Made by our team, it gives cool functionalities to create and manage Database Connections.
So back to OCI Resource Manager
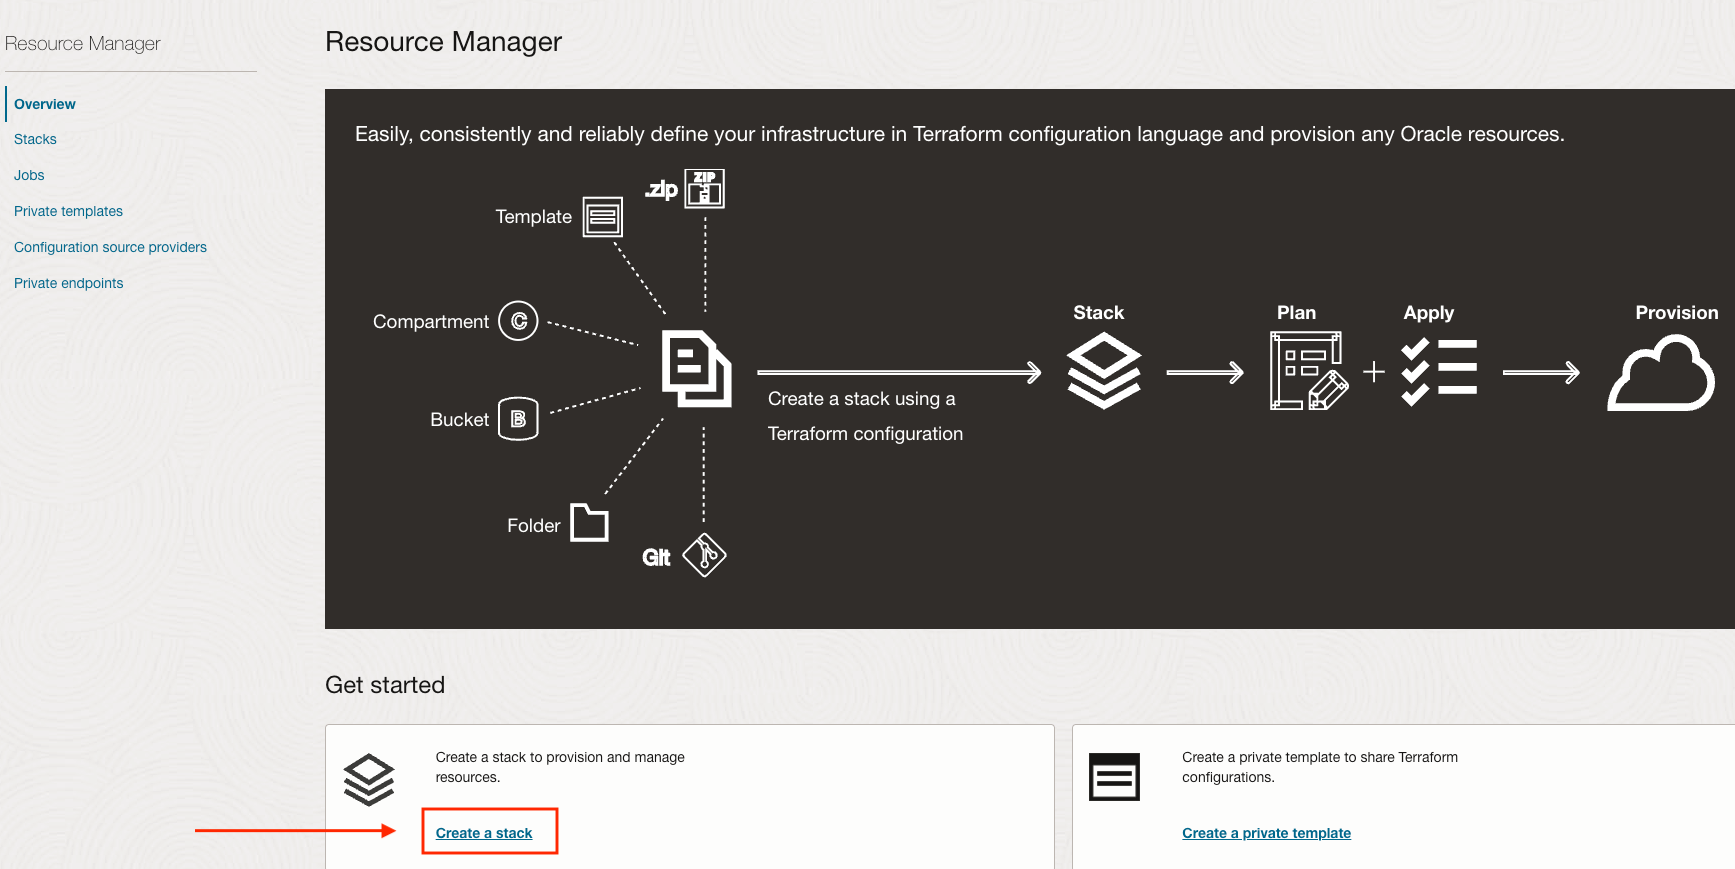
You get an illustration of what OCI Resource Manager does. In short, you define Stacks that allow you to provision OCI resources like Buckets and Functions.
On the left, make sure that the Compartment fun_oci_functions is selected. Click on Create a Stack.
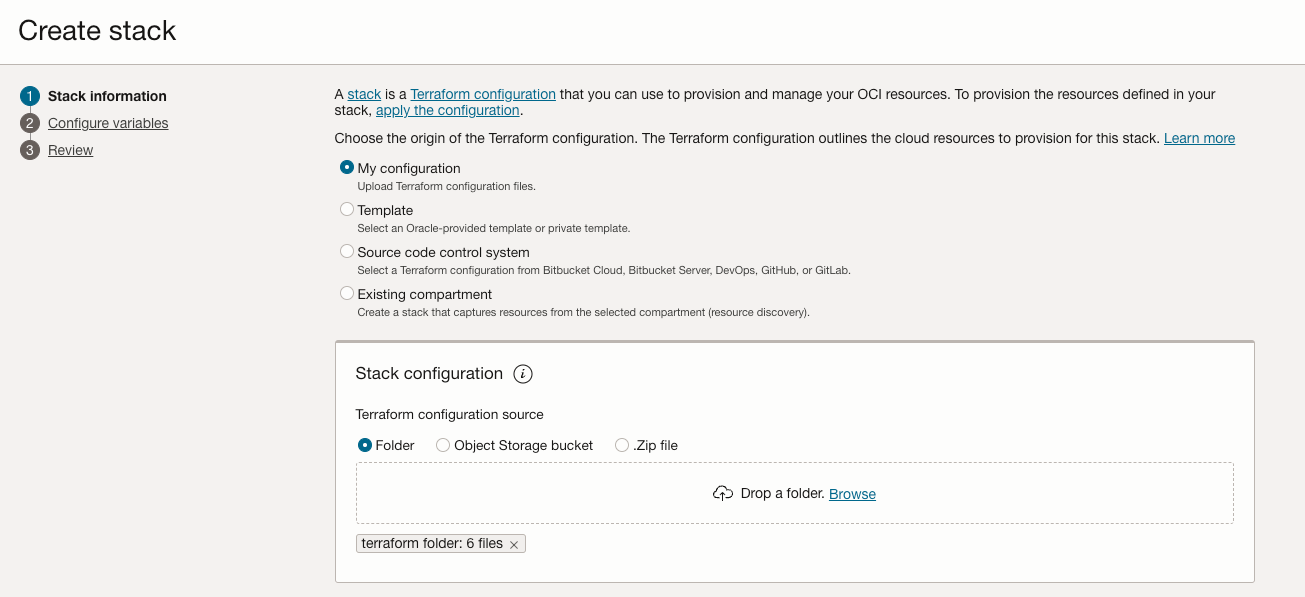
Drag the folder named terraform that you obtained from my GitHub repo.
Select Terraform version: 1.2.x near the bottom of the screen (not shown on my screenshot), then click on Next.
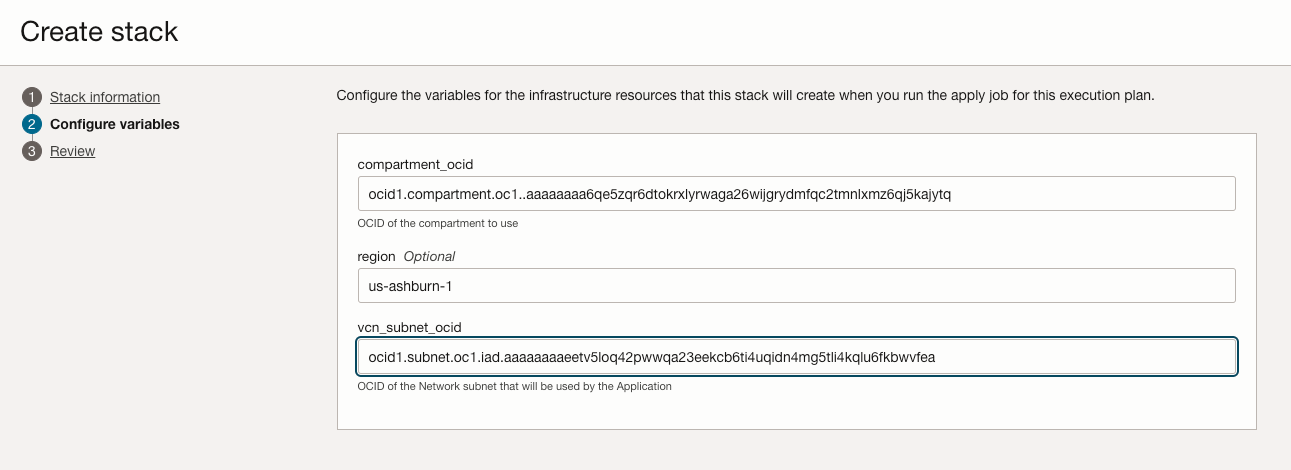
You still have that vcn_subnet_ocid sss that we saved earlier? It's is now time to use it.
- compartment_ocid: It will default to the current Compartment. That's OK.
- region: It will default your current Region, like us-ashburn-1. That's OK.
- vcn_subnet_ocid: Put the sss value here.
Click Next.
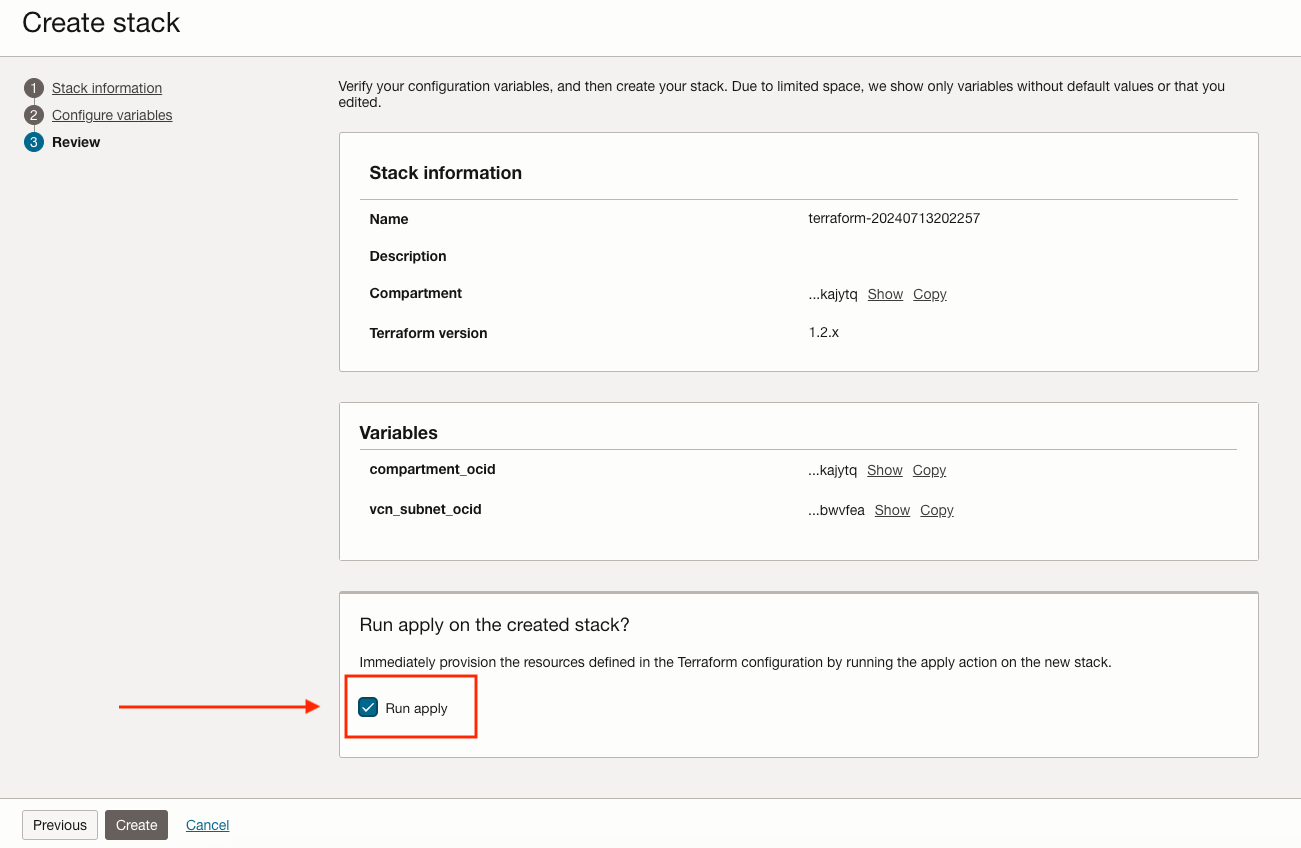
Click the Run apply checkmark so that the resource creation starts immediately. Then click Create.
A Terraform Apply Job has been started by OCI resource manager. In the Terraform world, Apply creates/updates resources and Destroy deletes them.
Wait a few minutes for all resources to be created. You should receive a big green square.
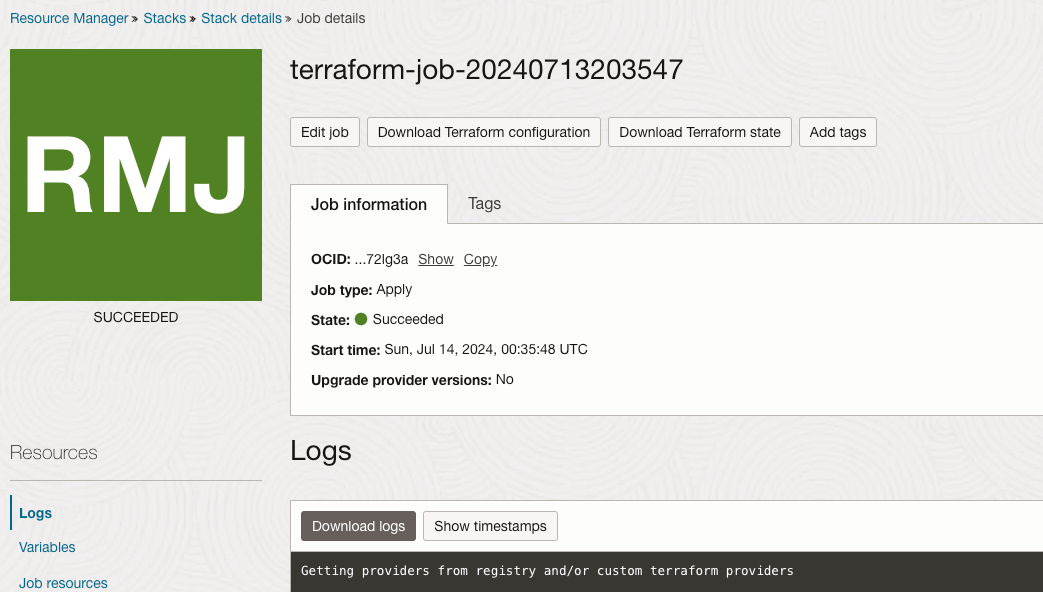
Optionally, if you are an avid learner, Click Download log for future studies.
Now, scroll down to the bottom of the Log, you should see that 8 resources were created.

Note the ocid value (without the double quotes) on the right of document_generator_fn_ocid. This is the unique Id of the Document Generator PBF that we just created. We will refer to it as fff.
What are the 8 resources that we created?
- An Application that is a logical grouping of functions.
- A Document Generator PBF that we will test in a few minutes.
- A Policy to allow the Document Generator PBF to use the buckets of this compartment.
- An OCI Logging Log used by the Application.
- An OCI Logging Log group for the Log.
- A Bucket to store the inputs and the outputs.
- A Container Registry Configuration. More on this in Part 2.
- A Container Registry to hold Docker images. More on this in Part 2.
I encourage you to check the optional section at the end, Review the Terraform Code Files, to gain a deeper understanding of how Terraform works. It's important to understand any Terraform code coming from Internet because it helps ensuring that your resources are minimal, maintainable, and secure (with the least privileges).
Invoke the Document Generator PBF
Input
The Document Generator PBF reads its Office Templates and JSON Data (inputs) from Object Storage and stores its generated documents (outputs) also in Object Storage.
Let's go and store our inputs in the Bucket that was created. In the top left Hamburger menu, select Storage, then Buckets.
On the left, make sure that the Compartment fun_oci_functions is selected. You should see a bucket named fun_oci_functions_bucket. Click on it.
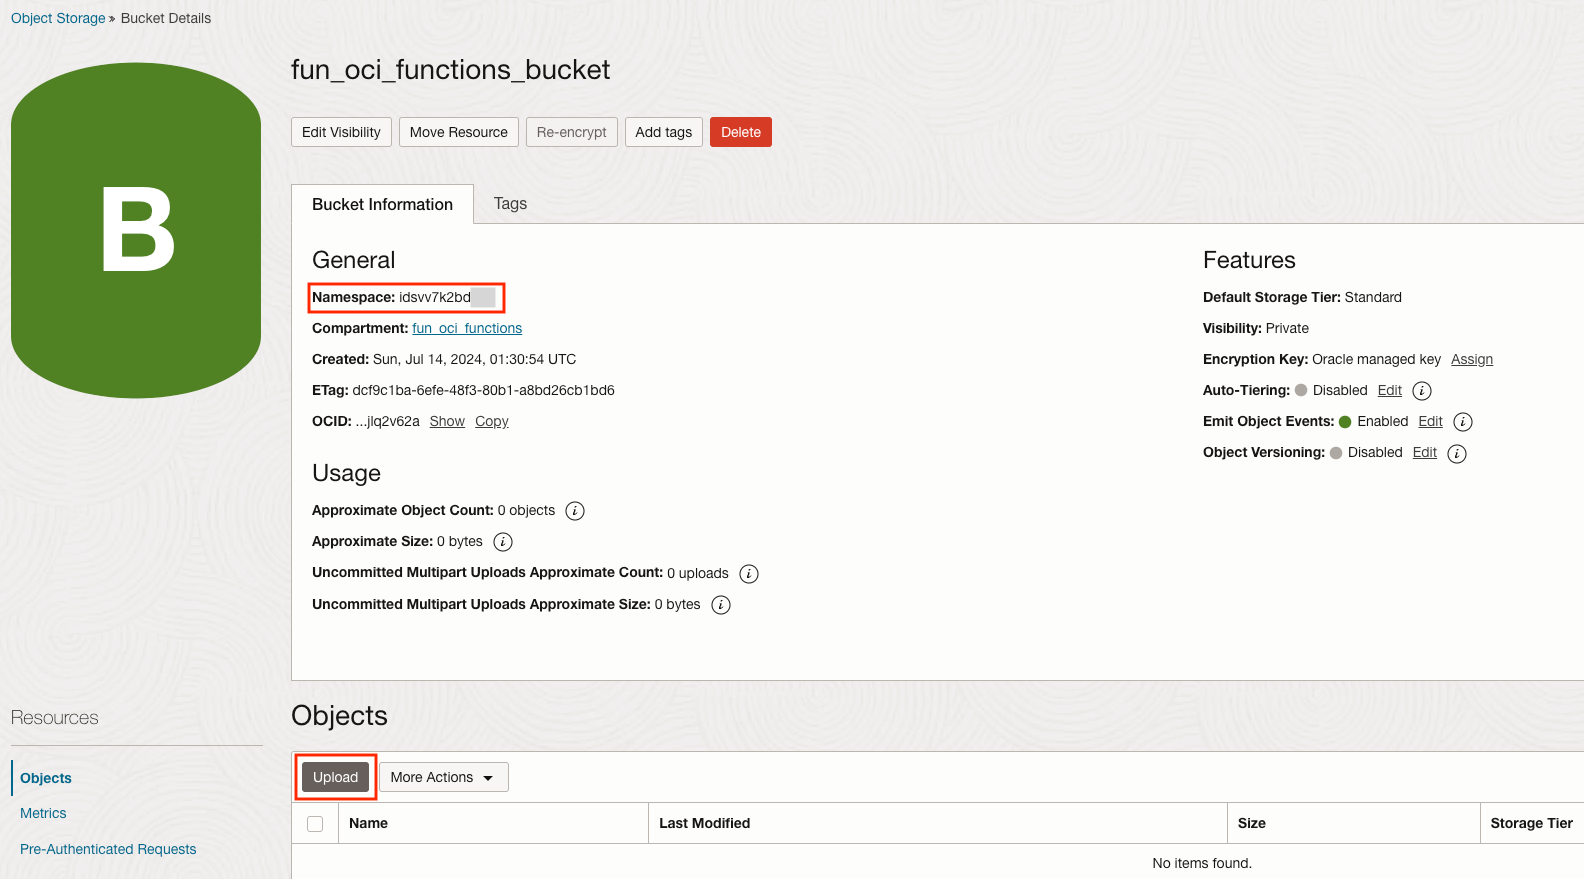
Let's note the namespace that was assigned. We will refer to it as nnn.
The bucket is empty at this point. Click on Upload. Then drag the 5 files from the folder document-generator-files that you obtained from my GitHub repo.
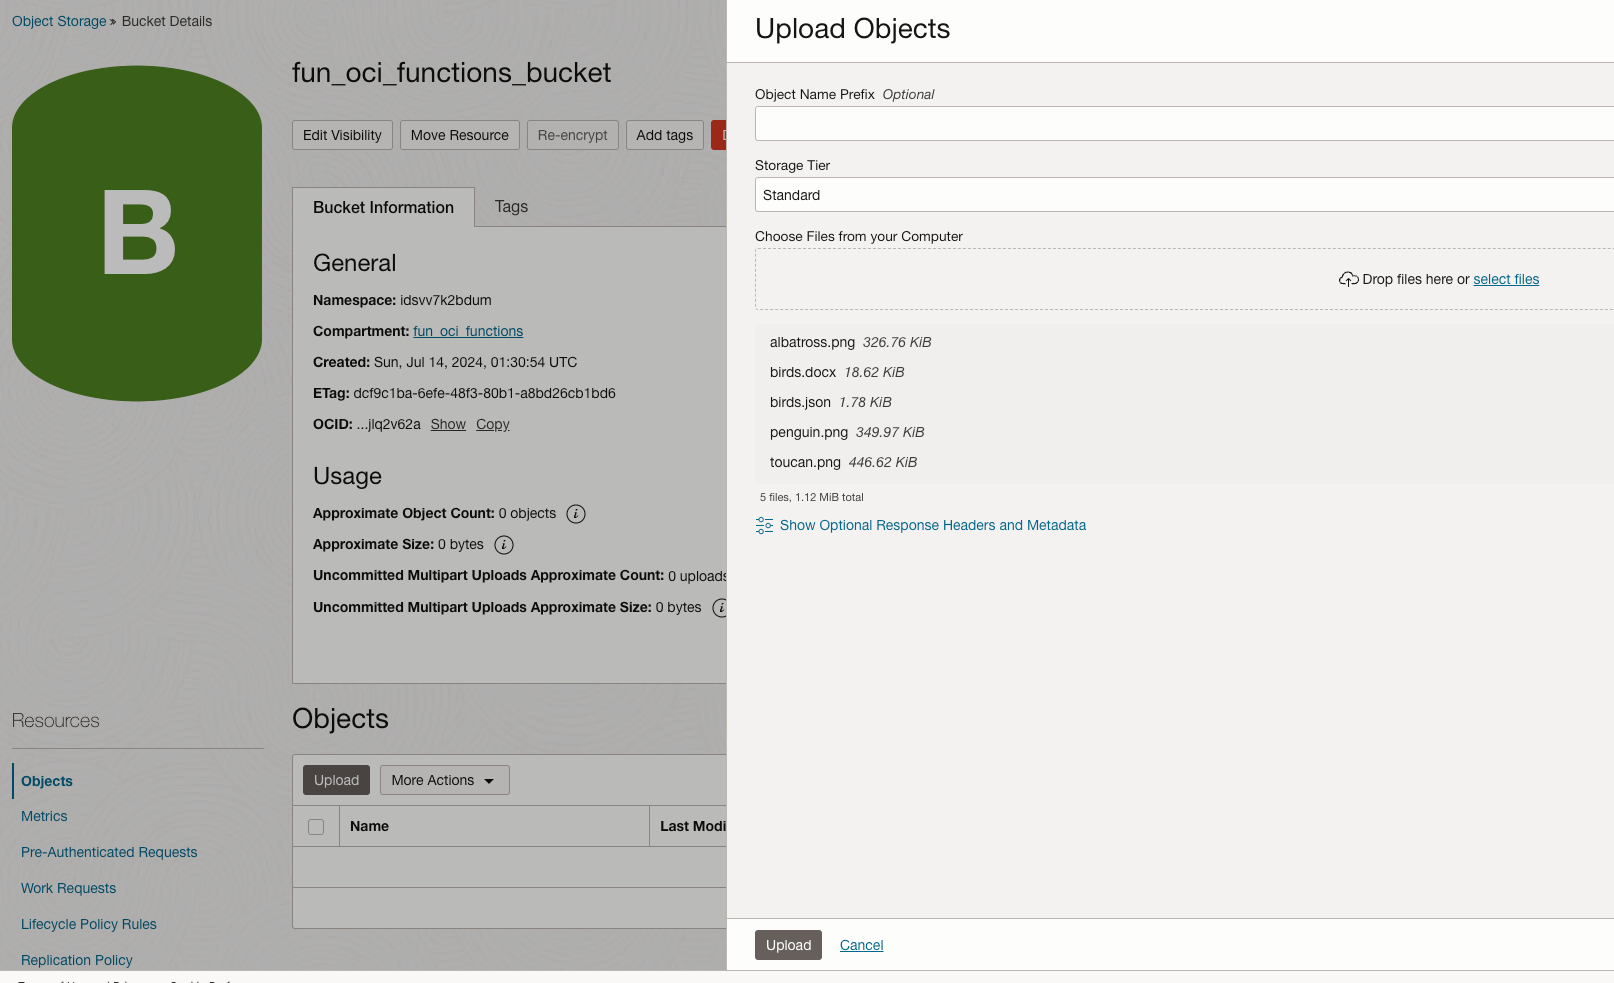
Click Upload, then Close.
In our Bucket, we now have:
- 1 MS-Word Template Document.
- 1 JSON Data file.
- 3 images of birds.
Generate a PDF with the Document Generator PBF
In the top left Hamburger menu, select Developer Services, Application under Function.
Again, on the left, make sure that the Compartment fun_oci_functions is selected. You should see an Application named fun_oci_functions_app. Click on it.
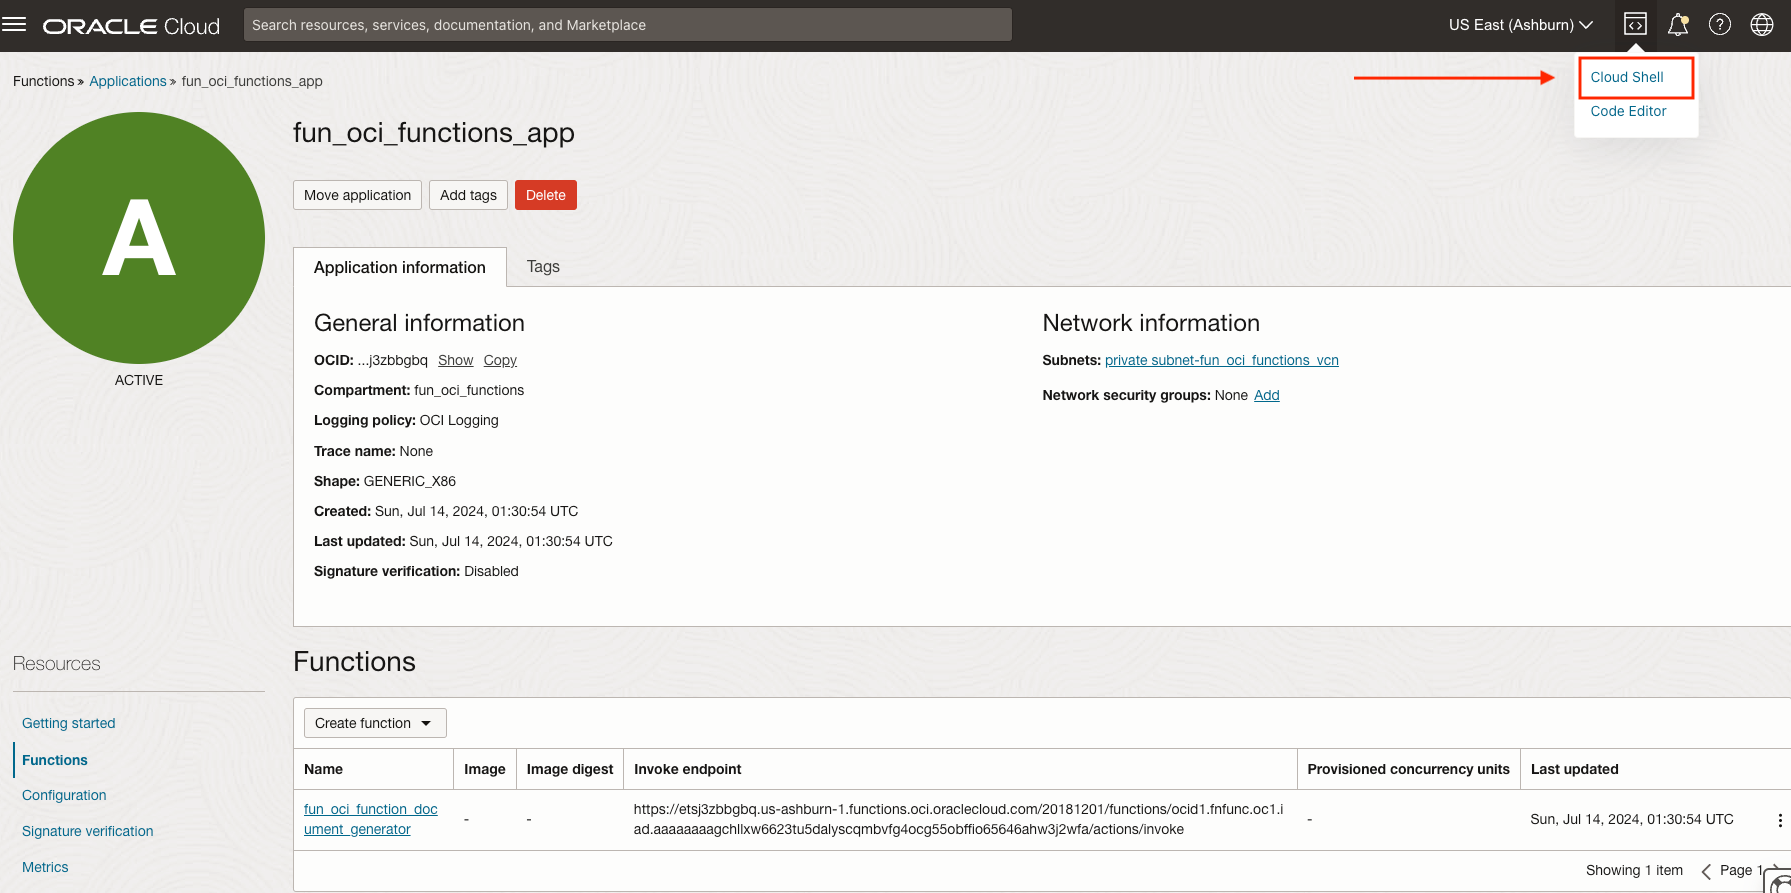
From there, open Cloud Shell. This will create a shell environment with multiple useful tools like the OCI CLI already installed.
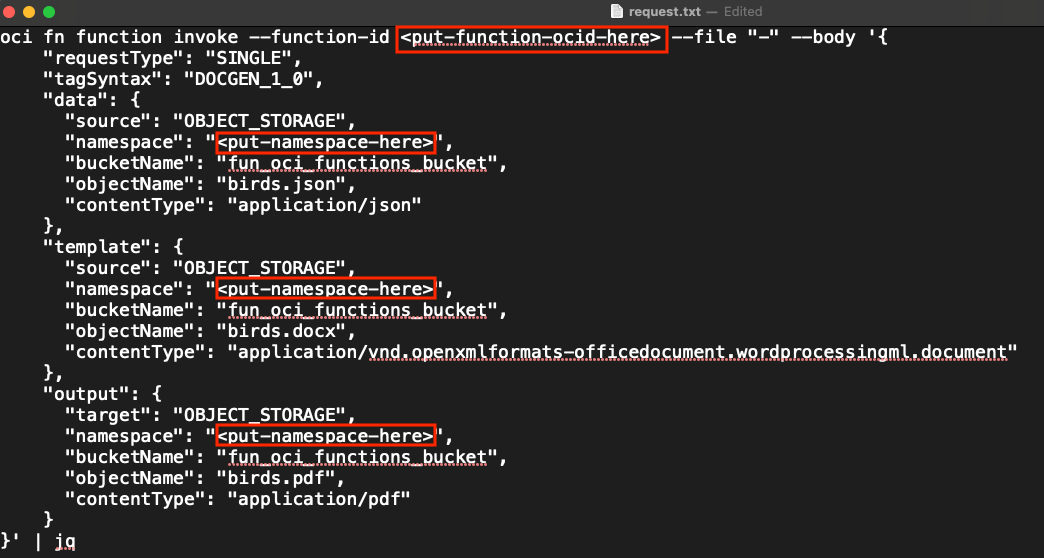
At the root of my GitHub repo, I have created a file named request.txt shown above. Modify it with your favorite text editor to replace:
<put-function-ocid-here>with the function OCID fff.- The 3 references to the namespace
<put-namespace-here>with the namespace nnn.
Then copy the content of the modified request.txt and paste into the Cloud Shell terminal. Press Enter on your keyboard.
The first call will take about a minute. In a future Post, we will see how to reduce that delay. Here we invoke the Document Generator with the OCI CLI. It can also be called from the OCI SDKs (for Java, Python, Node, Go, Ruby, and C#) and from APEX.
You should get a response like:
{
  "responseType": "SINGLE",
  "code": 200,
  "status": "OK",
  "metadata": {
    "version": "1.0.5",
    "configurationParameters": {
      "FN_FN_NAME": "fun_oci_function_document_generator",
      "FN_APP_NAME": "fun_oci_functions_app",
      "FN_TYPE": "sync",
      "FN_APP_ID": "ocid1.fnapp.oc1.iad.aaaaaaaaaj2sfl4fadgcezk53zwqpquxgtj57sslkwjil5re2p6s7hqpus6a",
      "OCI_REGION_METADATA": "{\"realmDomainComponent\":\"oraclecloud.com\",\"realmKey\":\"oc1\",\"regionIdentifier\":\"us-ashburn-1\",\"regionKey\":\"IAD\"}",
      "FN_FN_ID": "ocid1.fnfunc.oc1.iad.aaaaaaaagqkjy5rutlxuaadkuguvlcb7qkp26ubipmtesbbctn5vryonmxsa",
      "FN_MEMORY": "1024"
    }
  },
  "document": {
    "type": "OBJECT_STORAGE",
    "namespace": "idsvv7k2bdzz",
    "bucketName": "fun_oci_functions_bucket",
    "objectName": "birds.pdf",
    "contentType": "application/pdf"
  }
}
We see that a document named birds.pdf was generated in bucket fun_oci_functions_bucket.
Verifications
Verify the Log

While we are in the Application, let's check the Logs that were generated. On the left, click on Logs.

We see the Log that we created using Terraform. Click on app_log.
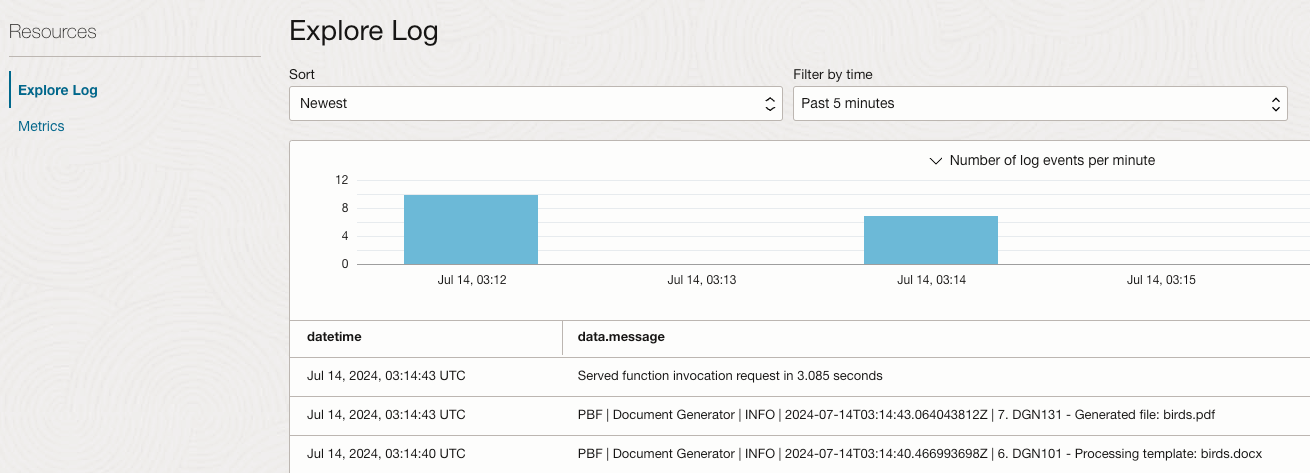
We now see Log entries for our execution. Here are a few tips regarding the Logs:
- It may take a minute or two for all Log entries to appear.
- If you don't see Log entries, augment the duration in Filter by time.
- To get more of Log data.messages to be visible, you can close the part related to type.
Download the generated PDF
In the OCI Console, go back to the Object Storage Bucket in which we uploaded our inputs. Let's see if you can get there by yourself.

We see that the generated birds.pdf is there. Click on the 3 dots on the right and click Download. You get a nice PDF with Fun Facts about some birds.
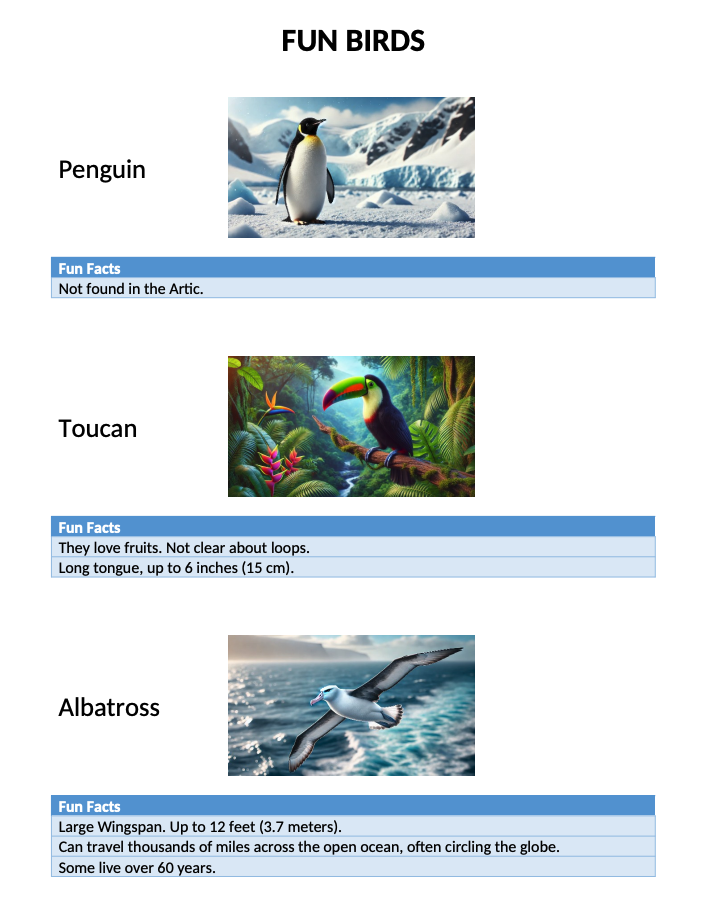
I invite you to experiment with the Document Generator PBF. You can modify the Template and JSON Data that you already have in the Bucket or you can create your own MS-Word Template and JSON data to fit your needs.
See the Document Generator PBF general documentation here and examples of MS Word Templates and JSON Data here.
This completes part 1 of the Fun with OCI Functions series where you created all the required resources and even generated a PDF from a Word Template and JSON Data. Good Job!
In my next Post, you will use the resources you created today and create your own Function to do more fun stuff.
Optional - Review the Terraform code files
Let’s start with a mini Terraform primer by comparing Terraform to CRUD (Create, Read, Update, Delete) operations in RESTful APIs, which you may be more familiar with. The two main actions in Terraform are Apply (to Create/Update) and Destroy (to Delete).
The Terraform Language is called HCL and contains a small set of block types.
- The primary block type in Terraform is
resource. During an Apply, it typically creates a new resource. If the resource already exists, there are 3 scenarios:- All new resource attributes are identical to the old ones, then no action is taken.
- Some attributes differ, and the resource supports updating these attributes, leading to an Update.
- Some attributes differ, but the resource does not support updating these attributes, resulting in a Delete and Create.
- During a Destroy action, the resource is Deleted.
You're are probably thinking: That resource block type is super-powerful. Well, you're right!
Additionally, Terraform has data sources, which correspond to the Read operation in CRUD. There are 2 variations:
datafor a specific resource, similar to a GET request with a specified resource Id.datafor fetching multiple resources, similar to a LIST operation where you provide criteria and receive a collection of items.
Let's quickly cover four other block types:
variable: Defines an input variable.output: Prints a value in the log, useful for displaying information after a configuration is applied.locals: Defines local values to simplify expressions and avoid repetition.provider: Defines a set ofresourceanddata. The provider "oci" contains all the OCI Services.
vars.tf
variable region {
    description  = "Region to use. Example: us-ashburn-1"
}

variable compartment_ocid {
    description  = "OCID of the compartment to use"
}

data "oci_identity_compartment" "fn_compartment" {
  id = var.compartment_ocid
}

# Output the compartment name
output "compartment_name" {
  value = data.oci_identity_compartment.fn_compartment.name
}

variable vcn_subnet_ocid {
    description  = "OCID of the Network subnet that will be used by the Application"
}
Here we mainly define the input variables that are used by OCI Resource Manager.
provider.tf
provider "oci" {
	region = var.region
}
We indicate that we will use the Oracle OCI Provider. The full documentation is here. All OCI resources, like VCNs, Computes and Database Tools Connections, can be managed with Terraform. That's very powerful!
object_storage.tf
# Document Generator Pre-Built Function uses a Bucket to read its inputs and write its output
# Define a new Bucket to use

data "oci_objectstorage_namespace" "the_namespace" {
  compartment_id = var.compartment_ocid
}

resource "oci_objectstorage_bucket" "fun_oci_functions_bucket" {
  access_type           = "NoPublicAccess"
  auto_tiering          = "Disabled"
  compartment_id        = var.compartment_ocid

  name                  = "fun_oci_functions_bucket"
  namespace             = data.oci_objectstorage_namespace.the_namespace.namespace
  object_events_enabled = true
  storage_tier          = "Standard"
  versioning            = "Disabled"
}
We get our unique namespace identifier and we create a private Bucket named fun_oci_function_bucket.
functions.tf
# Functions are in Applications
# Create the application
resource "oci_functions_application" "fun_oci_functions_app" {
  compartment_id = var.compartment_ocid
  config         = {
  }
  display_name = "fun_oci_functions_app"
  shape        = "GENERIC_X86"
  subnet_ids   = [
    var.vcn_subnet_ocid,
  ]
  syslog_url   = ""
  trace_config {
    domain_id  = ""
    is_enabled = "false"
  }
}

# Activate OCI Logging. All Functions of this App will use the same Log.
# Create an OCI Log Group
resource "oci_logging_log_group" "app_log_group" {
  compartment_id = var.compartment_ocid
  display_name   = "app_log_group"
}

# Create an OCI Log
resource "oci_logging_log" "app_log" {
  log_group_id    = oci_logging_log_group.app_log_group.id
  log_type        = "SERVICE"
  is_enabled      = true
  display_name    = "app_log"
  configuration {
    compartment_id = var.compartment_ocid
    source {
      resource    = oci_functions_application.fun_oci_functions_app.id
      category    = "invoke"
      service     = "functions"
      source_type = "OCISERVICE"
    }
  }
}

# Get the Pre-Built Function Listing of Document Generator
# This is equivalent to the statement: List all Pre-Built Function Listings where the name = "Document Generator"
data "oci_functions_pbf_listings" "pbf_listing_api" {
  name = "Document Generator"
}

locals {
  # There should be 1 collection with 1 list of PBF Listings
  document_generator_pbf_listing_id = data.oci_functions_pbf_listings.pbf_listing_api.pbf_listings_collection[0].items[0].id
}

output "document_generator_listing_id" {
  value = local.document_generator_pbf_listing_id
}

# Create a Document Generator Pre-Built Function
resource "oci_functions_function" "fun_oci_function_document_generator" {
  application_id = oci_functions_application.fun_oci_functions_app.id
  config         = {
  }
  display_name   = "fun_oci_function_document_generator"
  memory_in_mbs  = "1024"
  provisioned_concurrency_config {
    strategy = "NONE"
  }
  source_details {
    pbf_listing_id = local.document_generator_pbf_listing_id
    source_type    = "PRE_BUILT_FUNCTIONS"
  }
  timeout_in_seconds = "300"
  trace_config {
    is_enabled   = false
  }
}

output "document_generator_fn_ocid" {
  value = oci_functions_function.fun_oci_function_document_generator.id
}
Highlights:
- We first create an Application (a logical grouping of functions) that contains multiple attributes like the subnet in which the Docker Containers for the Functions will be run.
- PBF Functions have a PBF Listing, which corresponds to its entry in the Catalog of Functions. So we find the catalog entries that correspond to the string "Document Generator". There will be only 1.
- We create the Function asking for a maximum amount of memory of 1024 MB and up to 300 seconds of execution time before timing out.
policies.tf
# Document Generator Pre-Built Function uses a Bucket to read its inputs and write its output
# By default, a Function has no privileges.
# Allow our created Function to read and write any bucket of our dedicated compartment.

resource "oci_identity_policy" "fn_policy" {
    compartment_id = var.compartment_ocid
    description = "Allow a specific Document Generator Function to use Buckets"
    name = "fun_oci_functions_policy"
    statements = [
      "allow any-user to manage objects in compartment ${data.oci_identity_compartment.fn_compartment.name} where any { request.principal.id = '${oci_functions_function.fun_oci_function_document_generator.id}'}"
    ]
}
OCI Policies are authorizations/privileges and by default, a Function has no privileges. We give our Function only 1 privilege: It can read and write the objects in the buckets of compartment oci_fun_functions.
artifacts.tf
## Create a Docker Container Repository

resource "oci_artifacts_container_configuration" "container_configuration" {
  compartment_id                      = var.compartment_ocid
  is_repository_created_on_first_push = true
}

resource "oci_artifacts_container_repository" "fun_oci_functions_repo" {
  compartment_id  = var.compartment_ocid
  display_name    = "fun_oci_functions_repo"
  is_immutable    = false
  is_public       = false
}
We create a Docker Container Repository. It is not used in Part 1, but we will use it in Part 2 when we will create our own Function.
See you there!


